Import your codebase
This page covers how to bring a code repository into Artemis.
Getting started
Go to the Projects tab in the left panel. From here you have two entry points:

- Import Project — connect an existing Git repository or upload a code archive.
- Plan with AI — describe a project idea and let the agent generate a plan and implementation steps. Use this when starting from scratch rather than importing existing code.
Importing an existing project
Click Import Project to open the import page.
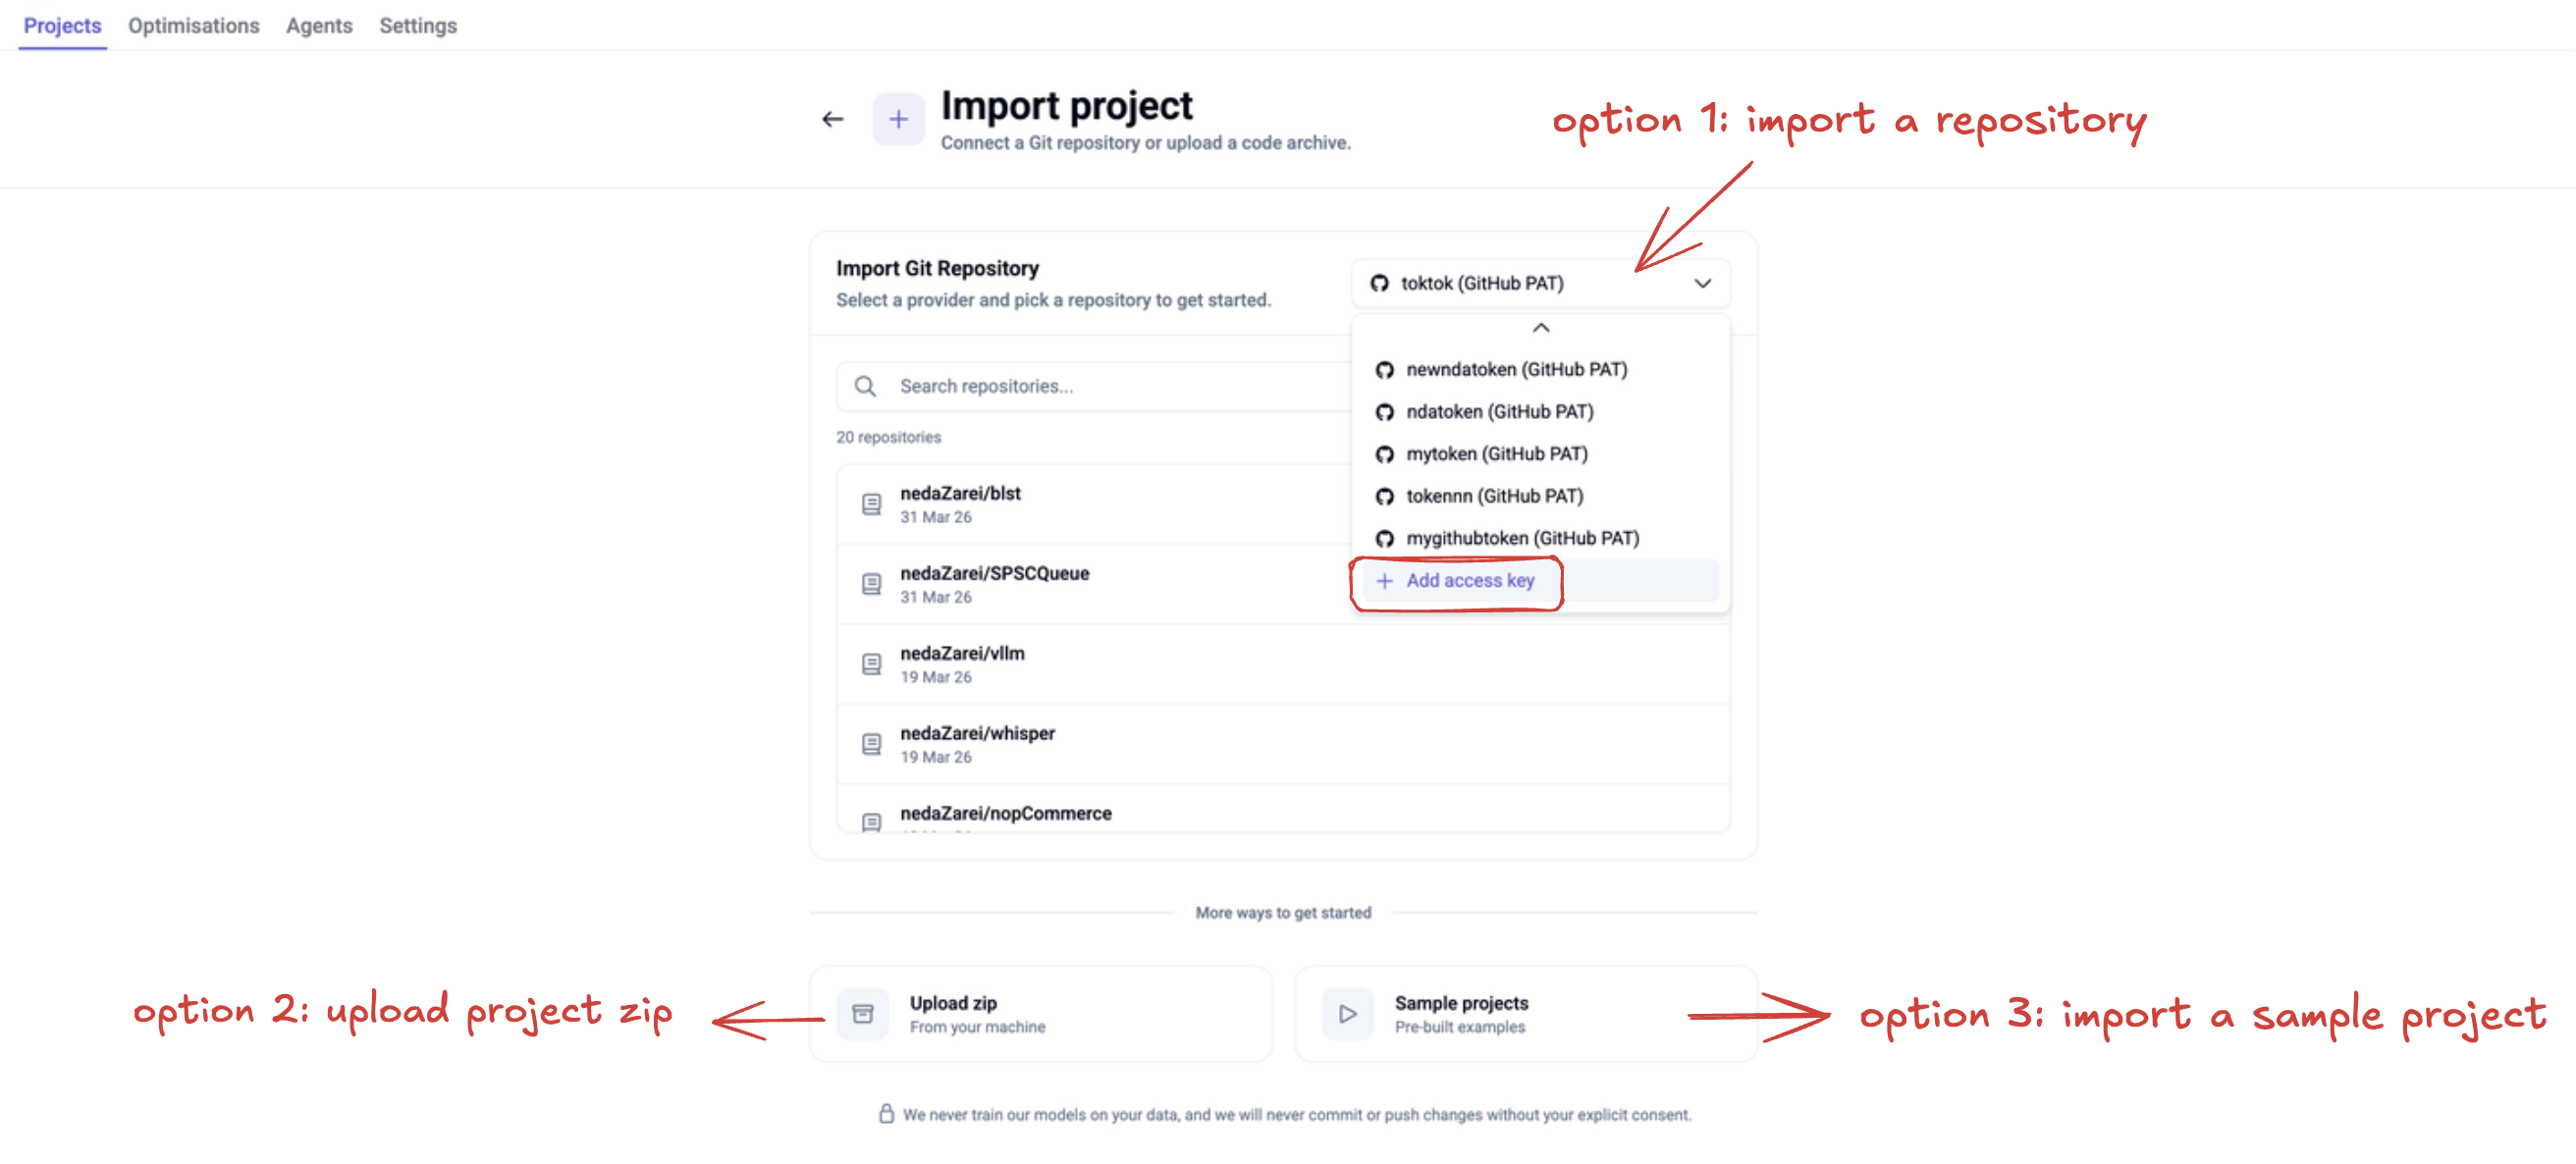
There are three ways to import:
Option 1: Import Git Repository (recommended)
Select or add an access key from the dropdown, then browse and select a repository from the list.
To add a new access key:
- Click
Add access keyin the dropdown. - Choose the key type that matches your Git hosting service:
- GitHub PAT — Personal Access Token for GitHub repositories
- Bitbucket App Password — for Bitbucket repositories
- SSH Key — works with any Git service (GitHub, Bitbucket, GitLab, etc.)
- Enter a name for the key, paste the token or private key, and click Save.
See Using private code repositories for step-by-step instructions for each key type.
Once an access key is selected, your available repositories will appear in the list. Select the one you want and click Import.
Option 2: Upload zip
Click Upload zip and select a .zip archive of your project from your machine.
Only .zip format is supported. Make sure your code is compressed before uploading.
Option 3: Sample projects
Click Sample projects to import a pre-built example repository. This is useful for trying out Artemis features before connecting your own code.
Starting a new project with Plan with AI
Click Plan with AI from the Projects page to open the planning interface.
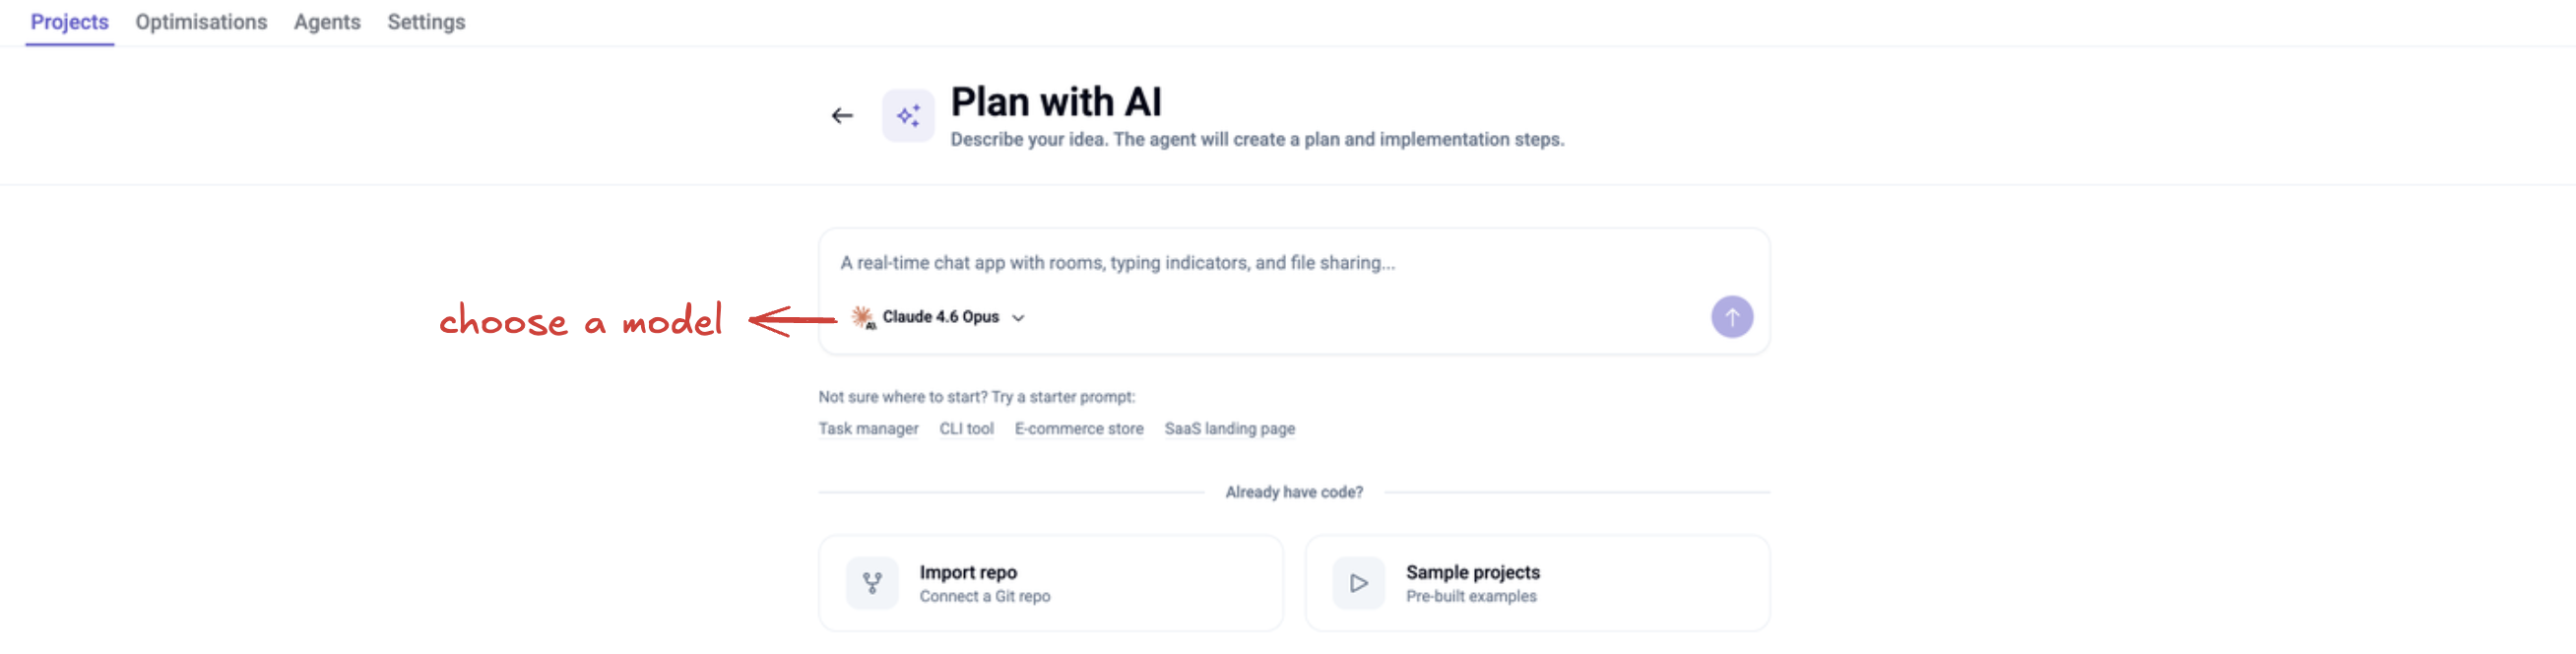
This creates a new project and launches the Planning Agent. Describe what you want to build — the agent gathers requirements, asks clarifying questions (such as tech stack preferences), and generates a structured plan with implementation steps.
You can choose a model, use a starter prompt, or switch to importing an existing repo from the same screen.
For more details on working with plans, see Plan overview.
Next steps
After importing your codebase:
- Optimize your code: Go to the Optimise section to identify targets and optimize them.