Creating an Optimization
Learn how to create and configure an optimization in Artemis to find the best-performing combination of your code versions.
Navigating to a New Optimization
There are two ways to create a new optimization.
From within a project
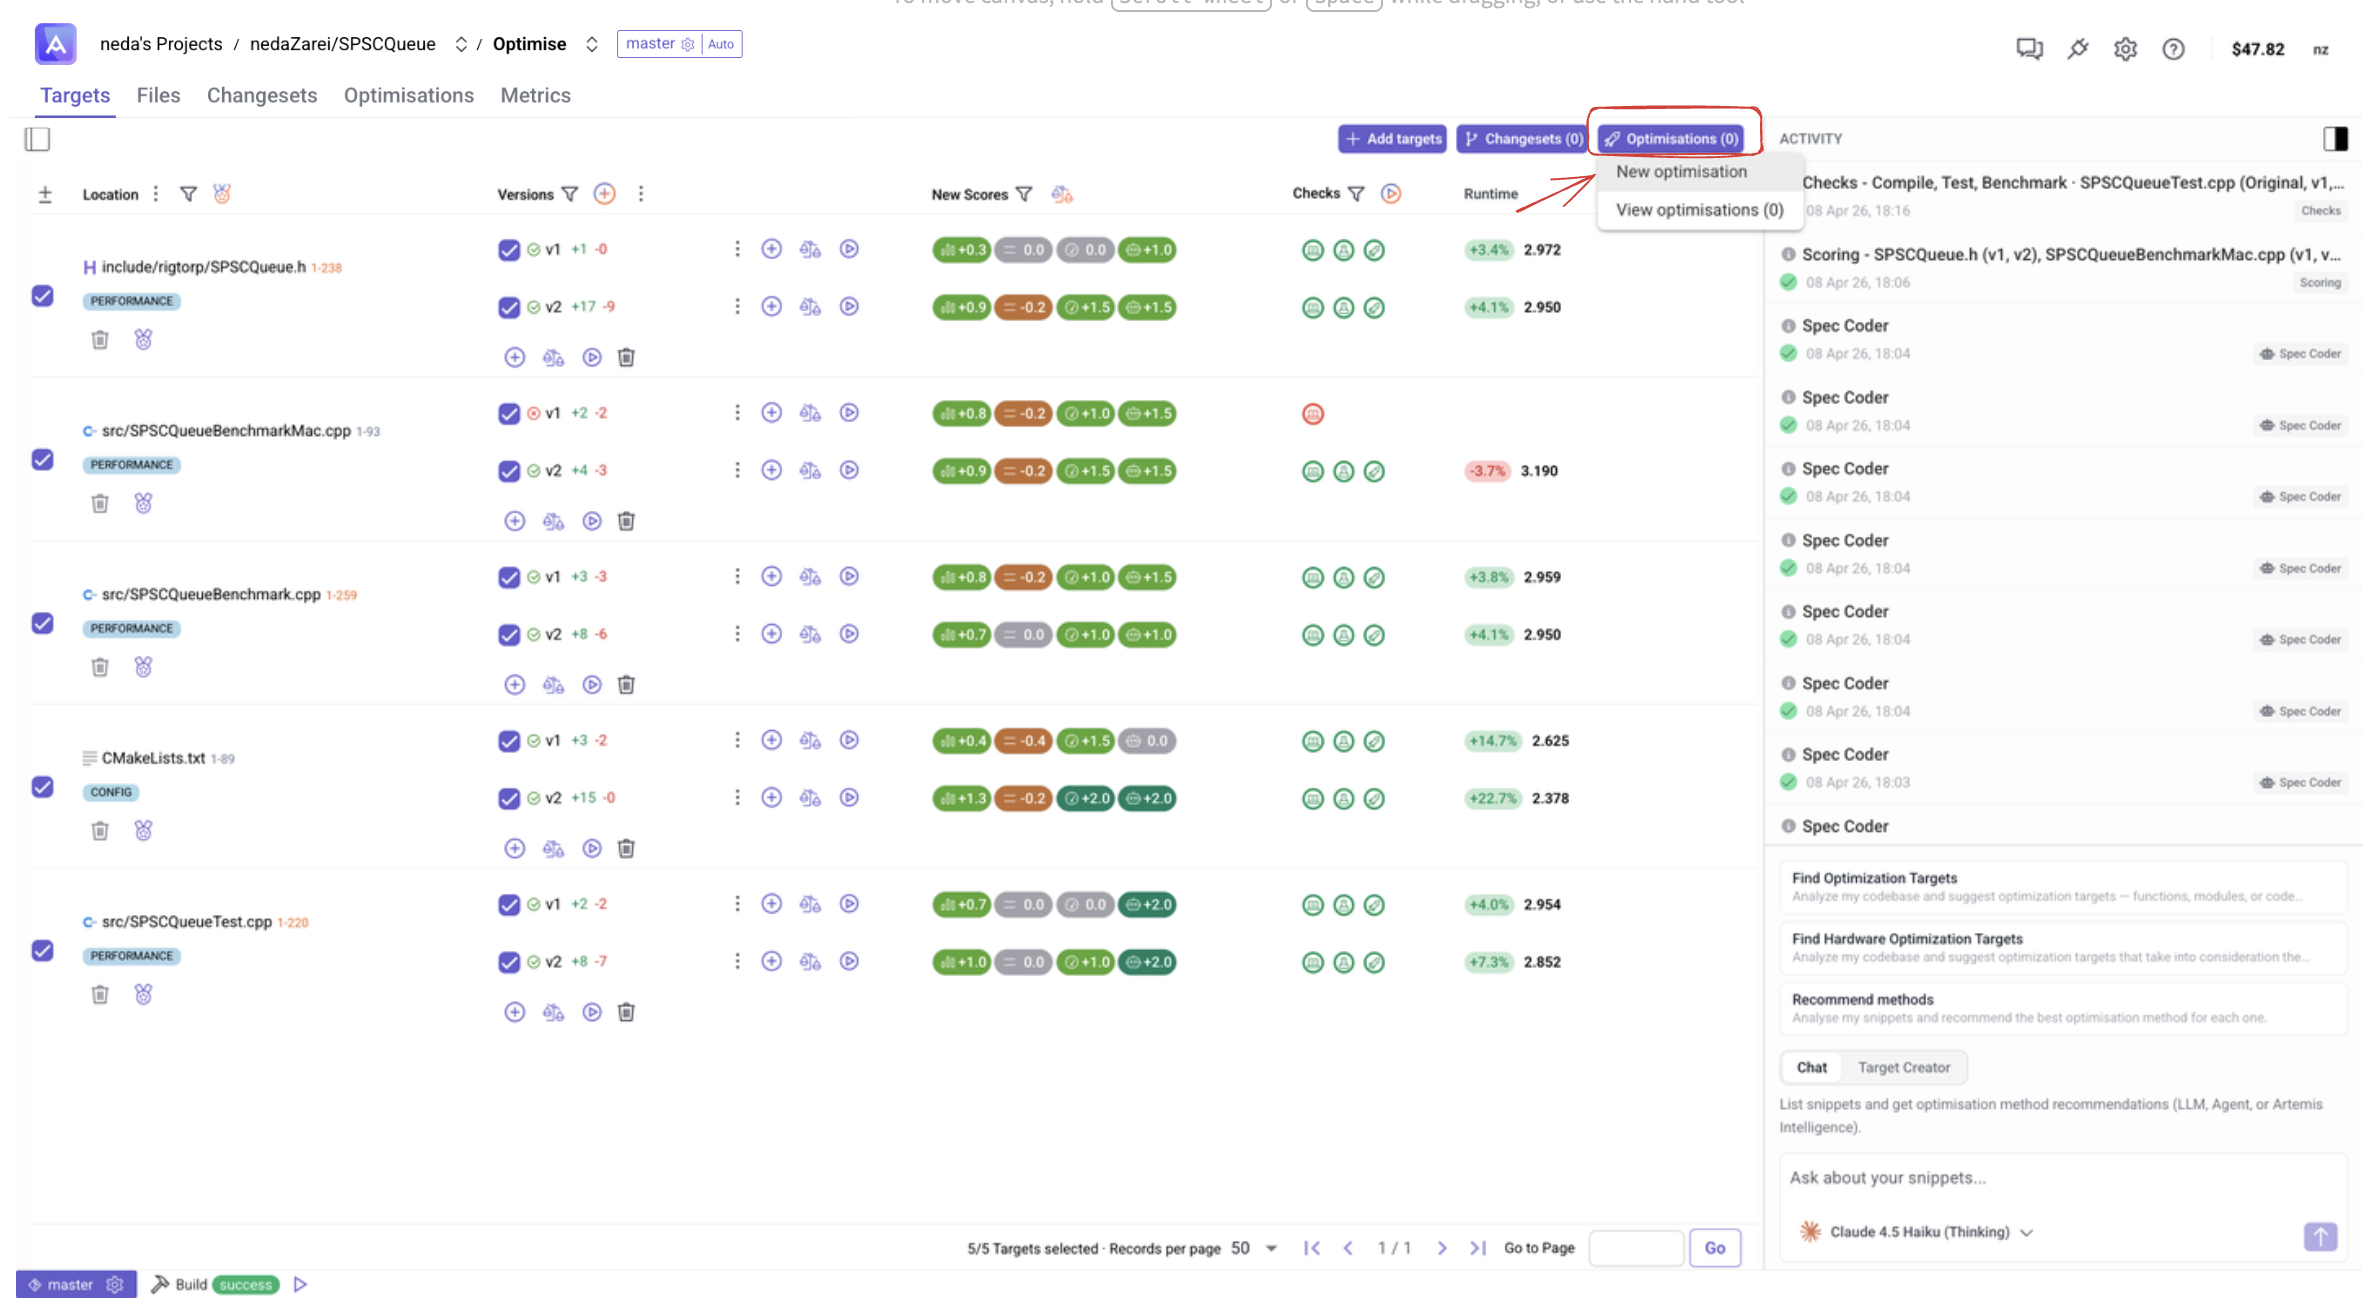
On the Targets page, click the Optimisations button in the top right. A dropdown will appear — select New optimisation.
From the Optimisations page
Navigate to the top-level Optimisations tab. Click New Optimisation in the top right to select a project and start a new optimization.

Step 1: Choose the code versions to combine
After arriving at the new optimization page, you'll see a table of all available code versions for your targets.
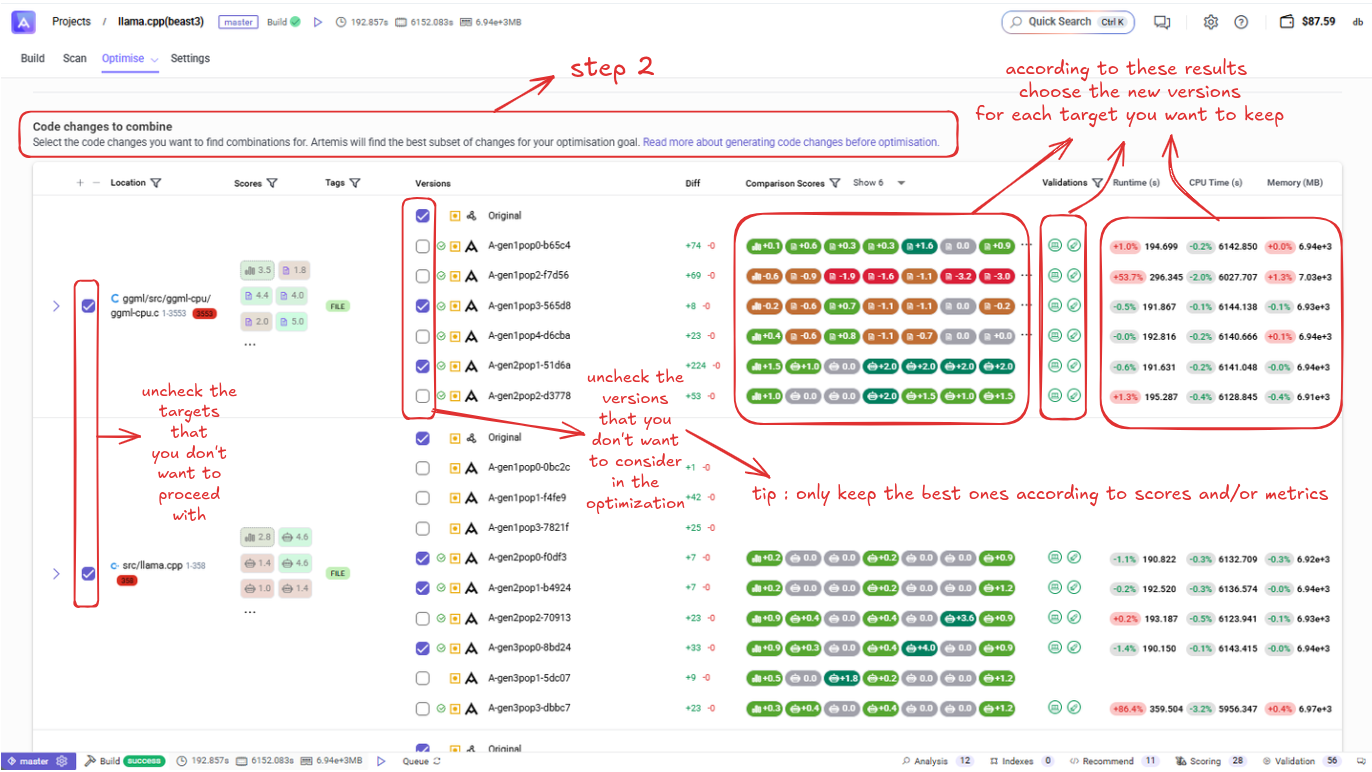
The table shows:
- Location — the target file path
- Versions — all generated versions (v1, v2, etc.)
- New Scores — performance score indicators for each version
- Checks — validation status (green = passed)
- Runtime, CPU Time, Memory — performance metrics per version
Selection tips:
- Keep the Original as a baseline
- Prioritise versions with green scores that have passed validation
- Focus on the best-performing versions to keep the optimization process efficient
Step 2: Configure and create
Once you've selected your versions, configure the optimization settings.
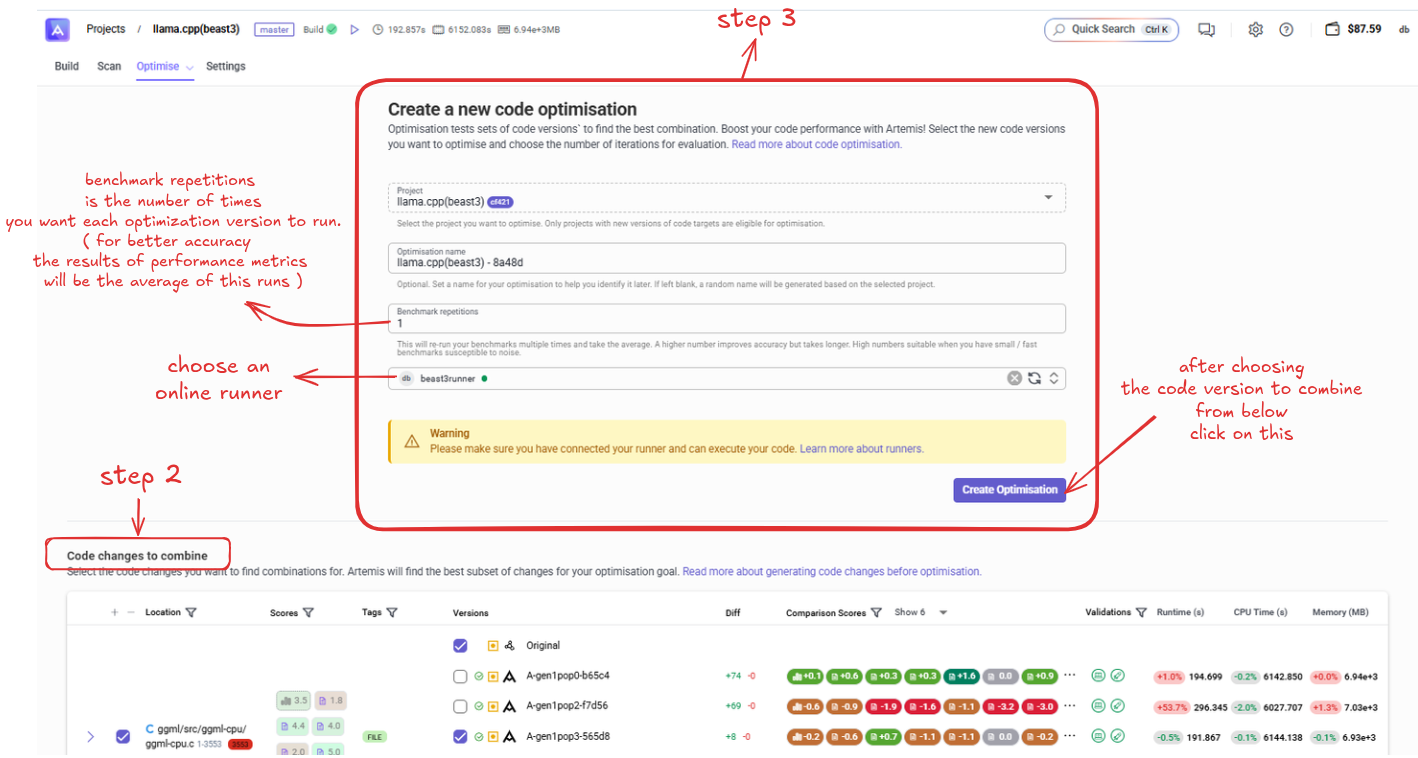
- Optimization Name — enter a descriptive name to identify this optimization later
- Benchmark Repetitions — number of times each version will run. Higher values improve accuracy but take longer. Results will be averaged across runs.
- Runner — select your connected runner. Make sure it's set up before proceeding. See Artemis Custom Runner.
Click Create Optimisation to start the process. You'll be redirected to the optimization management page.
