Agent Targeting
Agent Targeting is the default, agent-driven way to find optimisation targets. Instead of scanning every file yourself, you describe your goals to the built-in agent on the Targets page and it analyses your codebase to surface the highest-impact areas — then creates the targets for you.
How it works
1. Describe your goals to the agent
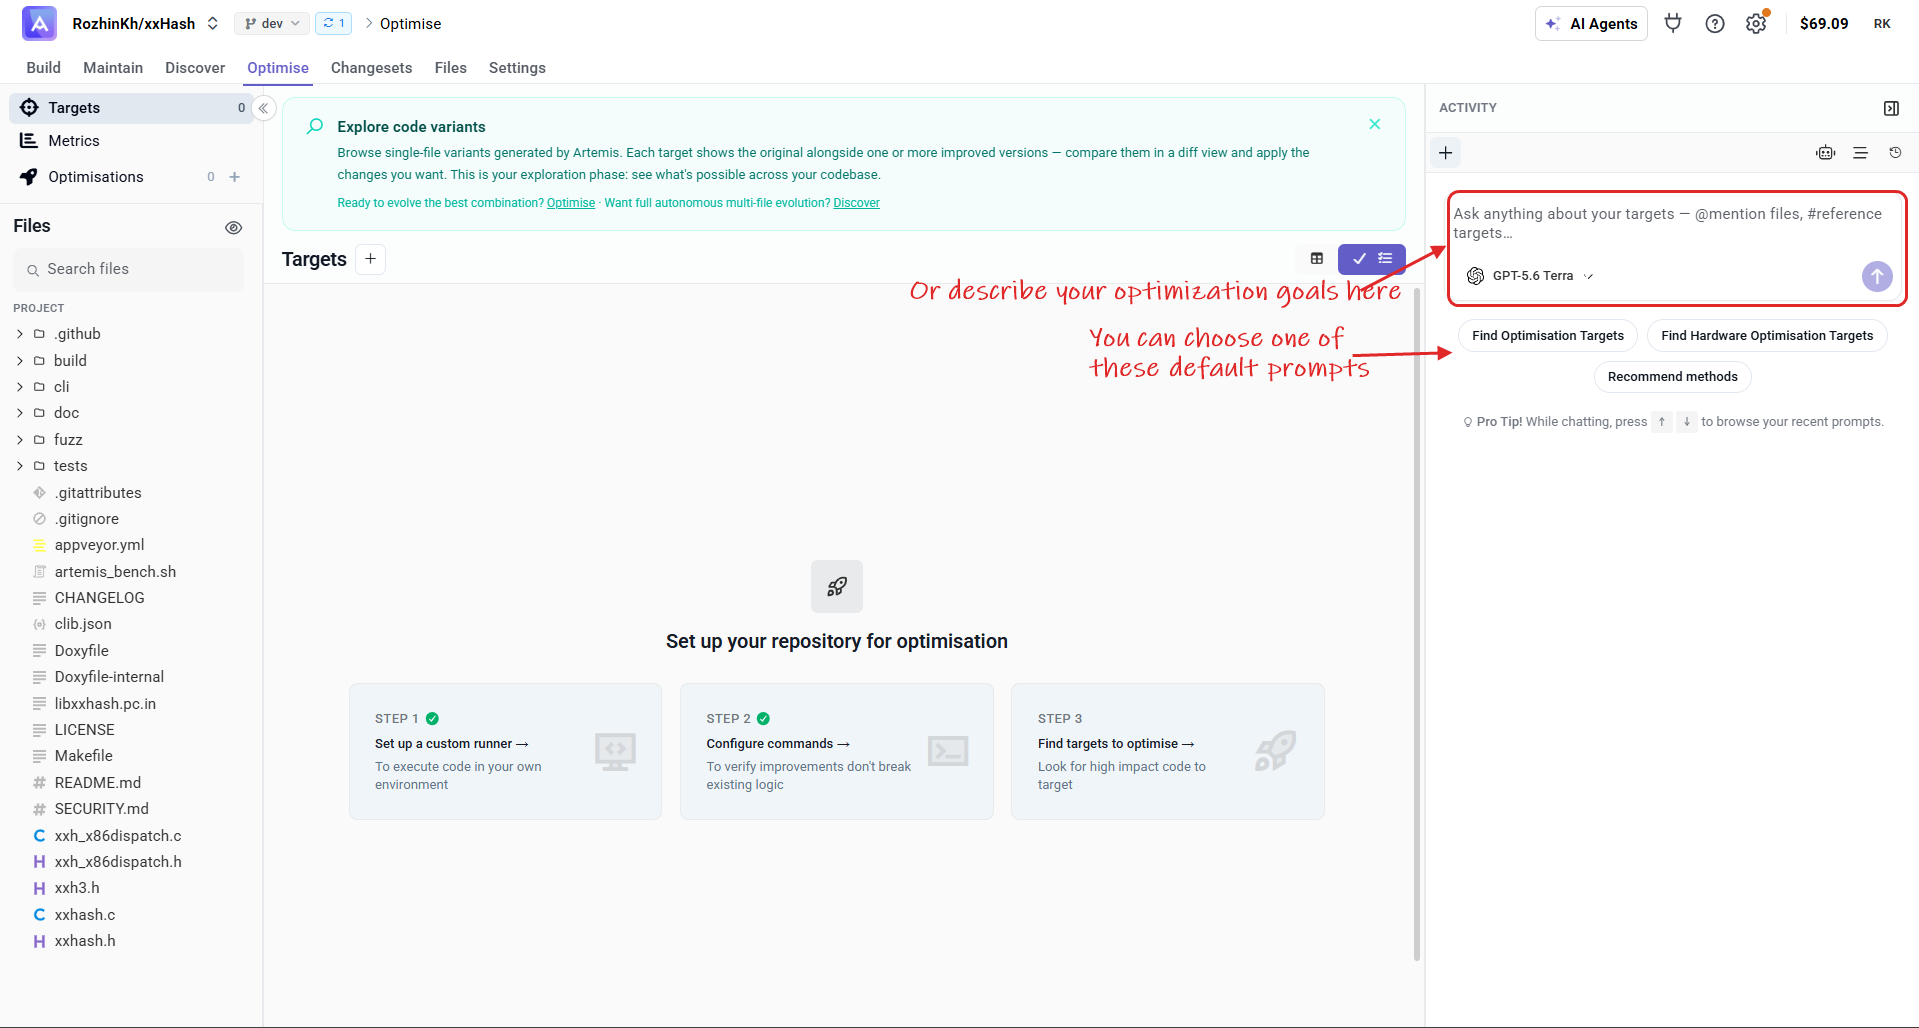
On the Targets page, the right-hand Activity panel hosts the agent. Type your optimisation goal in your own words, or pick one of the suggested default prompts to get started.
2. Review and create the suggested targets
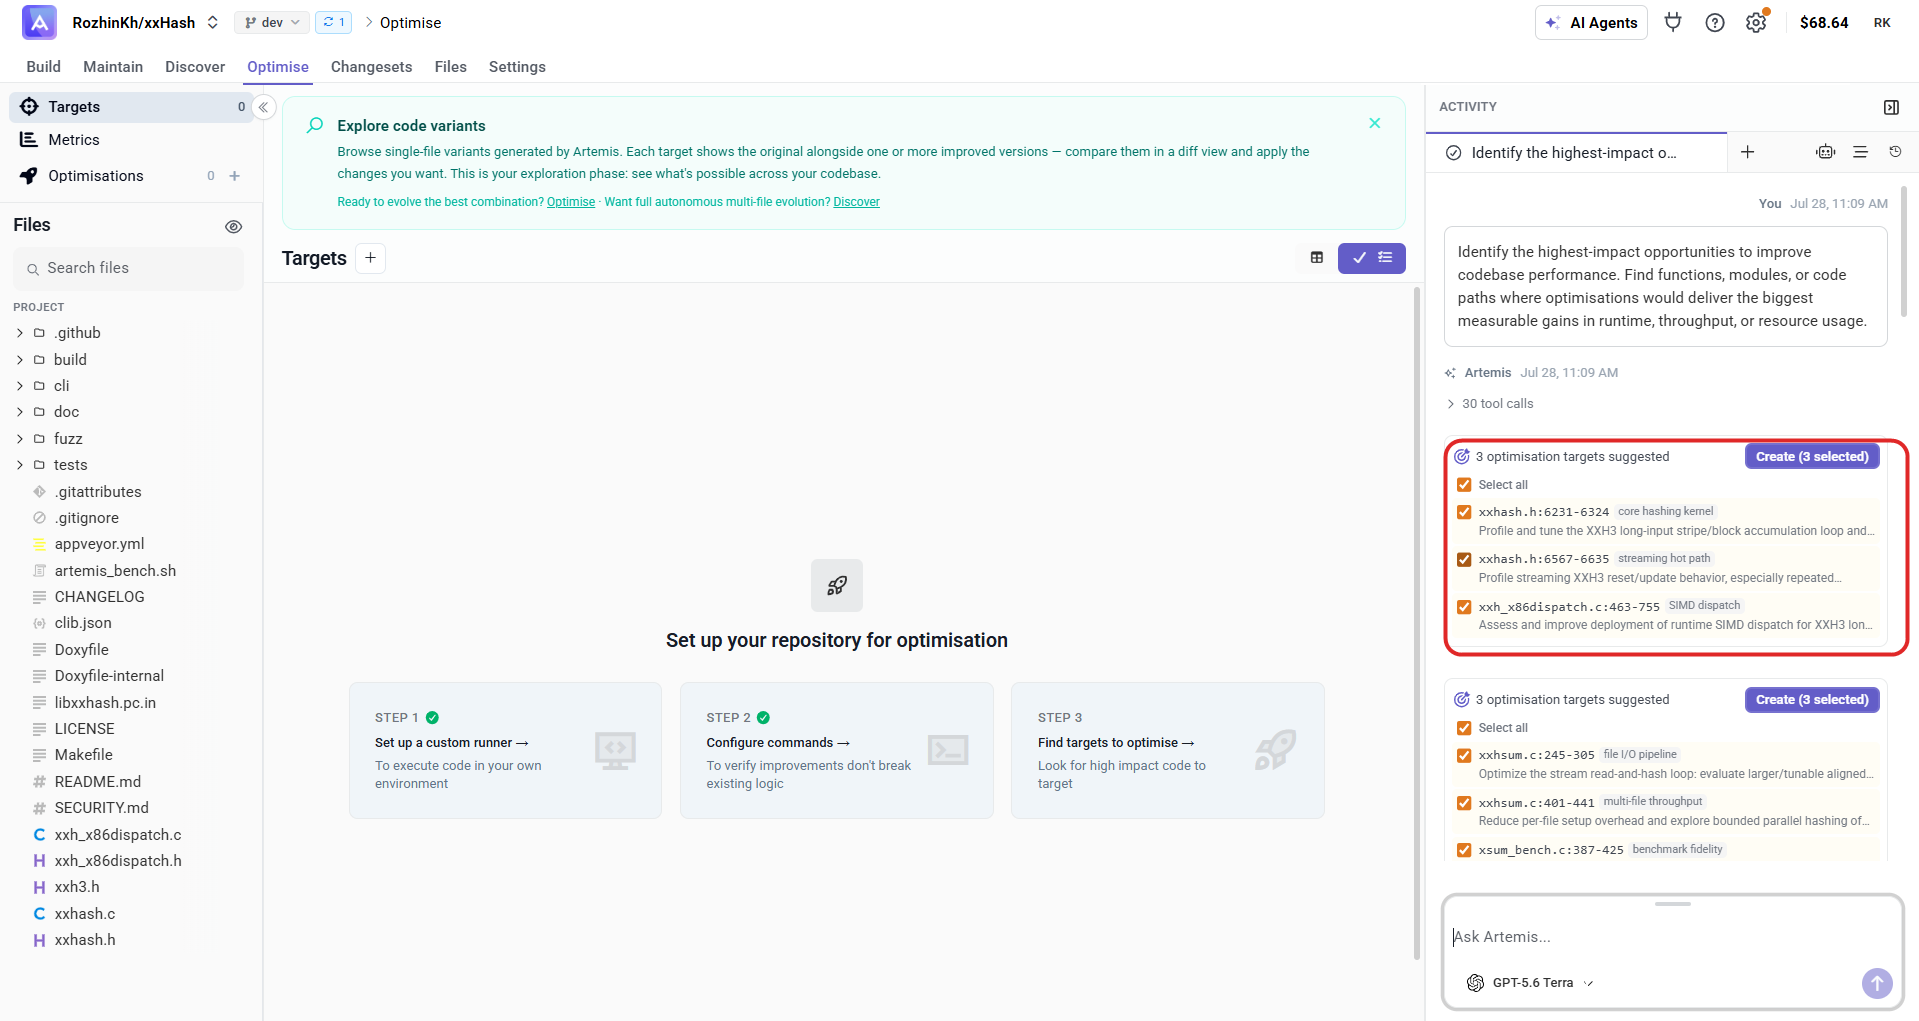
The agent analyses your codebase and returns a set of suggested targets — each with a file, line range, and a short rationale. Untick any you don't want, then click Create to add them to your Targets list.
3. Read the agent's reasoning
Alongside the targets, the agent explains why it chose them — the performance domains it found, the hot paths involved, and what to measure. Use this to decide where to focus and what a good result should look like before generating versions.
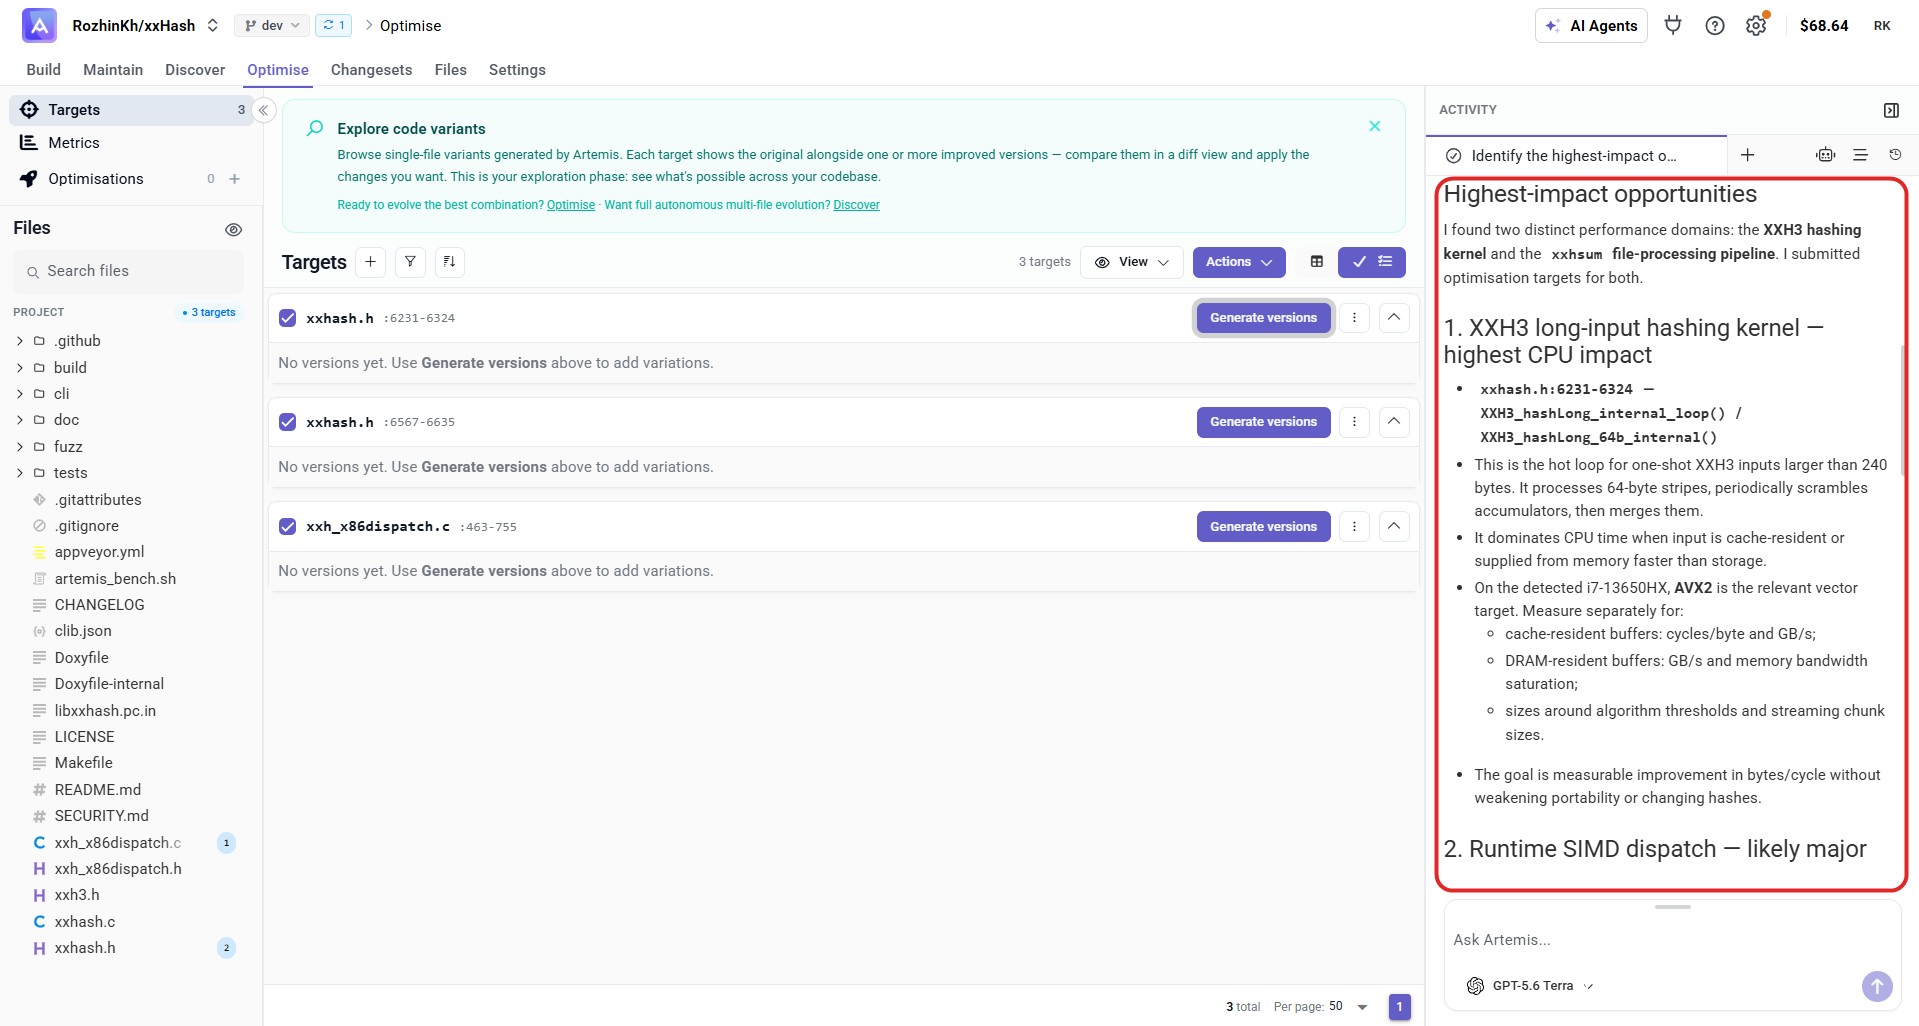
Once the targets are in your list, click Generate versions on any target to start producing optimised variants.
When to use it
- You want a quick, high-signal starting point without a full file-by-file scan
- You have a specific optimisation goal and want the agent to find the best targets for it
- You're working with a large codebase and want to narrow down fast
Next Steps
After targets are created:
- Score your targets to further prioritise
- Generate new code versions